

- Tissue masking — a whole-slide image is mostly background. Tissue segmentation produces a binary mask so background is discarded before the expensive feature step.
- Tiling — the slide is too large to process at once, so it is split into small, model-sized tiles. Only tiles that overlap tissue are kept.
Resolutions differ by stage: tissue segmentation runs at 8 µm/pixel (coarse, 512×512 tiles), while embeddings and gene predictions run at 0.5 µm/pixel (224×224 tiles). The mask is generated once and reused to filter the fine-resolution grid.
The quick path: the Inference pipeline
Inference masks tissue, caches the result, and reuses it automatically for later embed/predict calls.
<workspace>/tissue/<slide>.png and reused on the next tissue(), embed(), or predict() call. Visualize it against the slide thumbnail with the built-in helper:
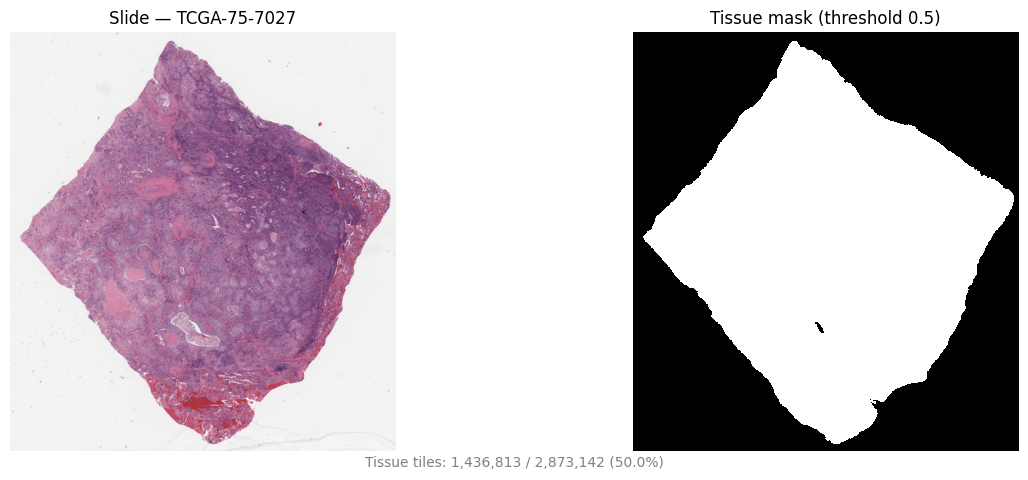
Tissue mask (right) beside the slide thumbnail (left), TCGA-LUAD TCGA-75-7027. Background is discarded before feature extraction. Representative example.
The manual path: masks and tiles as artifacts
1. Generate a tissue mask
Build a mask provider from the tissue-seg endpoint. It is reusable across slides — it generates a fresh mask per slide..npy):
Bring your own segmentation (custom mask provider)
Need a different segmentation model — for example one that is robust to marker-pen artifacts, or one you already run in-house? SubclassTissueMaskProvider and return your own mask. TileExtractor and the Inference pipeline depend only on this interface, so any provider — algorithmic, model-based, or a wrapper around an external tool — plugs in unchanged.
What the mask must be. A 2-D
uint8 (H, W) array where 1 = tissue. Two rules keep it aligned with the tiling grid:- Resolution is flexible. The mask does not need to match the slide’s pixel dimensions or any specific µm/pixel —
TileExtractorresizes it (nearest-neighbour) to the reference level before filtering. A mask produced at 2 µm/pixel therefore aligns correctly against a 0.5 µm/pixel tile grid. - Extent must match, not just aspect ratio. The mask is stretched onto the slide’s tissue-bounded region —
reader.dimensions(bounded=True). For slides with no scan-area metadata this equals the full slide, so a full-slide mask is correct. For slides that do carry bounds metadata (e.g. some scanner formats),bounded=Trueis a crop; a mask spanning the whole slide would be squashed into that crop and misalign. Produce the mask over the same region your segmenter sees, and comparereader.dimensions(bounded=True)withreader.dimensions(bounded=False)if unsure.
MASK_ASPECT_MISMATCH warning is emitted so a transposed or wrong-slide mask does not pass silently.Inference at that directory with tissue=False (shown next), or pass it straight to TileExtractor(mask_provider=...) when tiling manually (see Tile the slide below). To confirm alignment visually, save the mask and overlay it on the slide thumbnail with utils.plot_slide_and_mask (see the quick path above).
Hybrid pipeline: local mask, remote embeddings
Because masking and embedding are independent stages, you can produce tissue masks locally with a custom provider while sending the surviving tiles to a remote endpoint (e.g. AWS SageMaker) for embeddings. This is a two-phase workflow: first generate and save the masks, then run inference against them withtissue=False so the built-in tissue-seg model does not recompute over your masks.
Phase 1 — generate the masks with your custom provider and save them by slide stem:
mask_dir pairs each mask to its slide by filename stem via the built-in PrecomputedTissueMask provider, and tissue=False ensures your masks are used as-is. The embedding backend (backend="aws") is chosen independently of how the mask is produced.
2. Tile the slide
ATileSpec defines the tile geometry; TileExtractor builds the grid, filters it against the mask, and exports the tiles. Passing mask_provider lets the extractor generate the per-slide mask during fit.
to_csv writes one row per retained tile:
save writes each tile image as {slide}_x{left}_y{top}_w{width}_h{height}_{res}_mask_r{ratio}.png.
Tuning knobs
For guidance on which of these knobs actually affect throughput (and by how much), see Performance tuning.